Photoshop Softening...
One of the things I am called on to do from time to time is a bit of Photoshop "softening." Working with photographs of people can be one of the most challenging things, especially as the model in the photograph is maturing and wanting to put their best face forward. Now when shooting the photo, there are a number of things to take into consideration, especially lighting, that will help you in the long run. Typically a more diffused, indirect light will help you to minimze shadows (wrinkles).
But, if you have done all you can, and still not happy with the image, there are a few things you can do, to subtly create a bit more flattering appearance. Now we aren't talking a full out, "make me look like Elle McPhereson" kind of a project, but say you want to minimize some wrinkles and keep the image from looking a bit too plastic. Here is my technique, which I came to on just trial, error, and a lot of practice. Unlike some techniques you will find, this is a pretty gradual change, which I feel gives you a bit more control.
OK, start with your image:
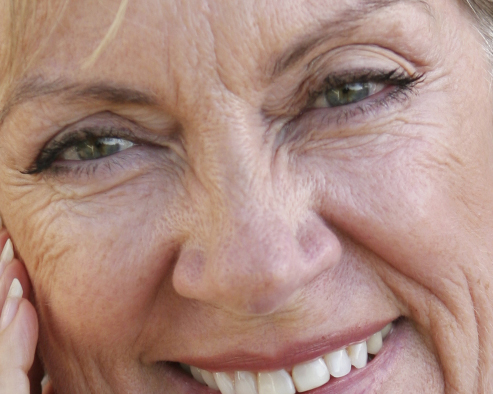
Not too bad, but there are a few things we can do to help...
Start with duplicating the layer in Photoshop. This will allow you to have a backup copy and easily see the changes you have made. I like to work on the top layer, hide the bottom layer for now.
We will be using the Cloning tool, which you may or may not have had luck with before, but with a few tweaked settings. This is where I like to start out at:
I am using a relatively small brush, maybe twice the size of one of the deeper wrinkles. Set your mode to "lighten" becase what we want to do here is to just minimize the appearance of the wrinkles (shadows) and not be addind others from surrounding sample areas. I like to start out with an opacity of 25%, this alows you to create a soft controlled change, it might take a few more strokes of the clone tool, but we are just looking for gradual change here.
Now, holding the option key and using the crosshairs, find a sample area from which to clone. You want to make sure that this area is close in color to the area surrounding the wrinkle and that you have a little room to move. The area you select does not need to be completely free or wrinkles, because we are set to "lighten" only, we aren't going to pick up those darker tones. Clone just in the lines of the wrinkles you want to minimize. They will gradually lighten. Be sure to hit the crows feet on the outer edges of the eyes, just below the eyes, and the brow line. You can choose to also work around the mouth and nose to reduce laugh lines or lines from smoking. Be a bit more careful here, it is pretty easy to start to flatten out the face, and you want to keep some depth.
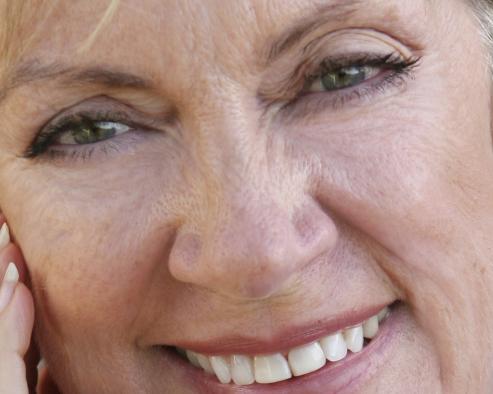
After a little work, this is what the finished product looks like. Notice that you can still see the skin tone, pores, variation in coloring. Very subtle changes.
Here are the images side by side:
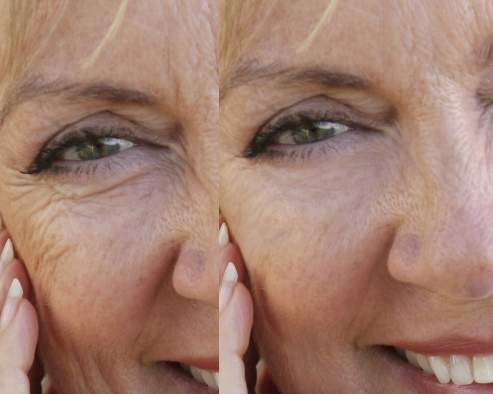
You can continue to repeat the process, getting rid of more and more fine lines. Also, when "softening" someone, don't forget the neck and hands, they are the first dead giveaway that you have done work on the image. The same technique can be applied there as well.
Want to see how far you have come. Turn on your duplicate layer in photoshop and click the "eye" on the top layer off an on. This will give you a sense of where you have made progress and where else you can do more. Have you gone too far? Turn both layers on, and set the top layer (the one you have retouched) to lighten and dial the percentage down to a level you are happy with. Viola, natural, younger looking skin!
Let me know if this works for you, I would love to see where you have applied it.
 Brenda Levos